Down to step up your cooking game up from frying eggs and putting rice in the rice cooker? Or trying to break away from the only dishes your Filipino mom taught you how to prepare? Maybe you’ve been attempting to cook your favorite Filipino comfort foods but they just haven’t been coming out right?
In any case, it can all start with adobo. Meaty goodness cooked in soy sauce, vinegar, garlic, pepper, and bay leaves. But how is it cooked? I don’t think that ever gets emphasized enough. When you cook meat by partially submerging it in a simmering liquid, you are braising. Filipino adobo defined then becomes meaty goodness braised in soy sauce, vinegar, garlic, pepper, and bay leaves.
A good thing about braising, like many other cooking techniques, is that it can be found in cuisines all over the world. These parallels in cooking means that if you just focus on techniques, you can simply switch out a few ingredients and flavor profiles to end up with a dish from an entirely different culture.
Therefore, if you can cook a good Filipino adobo dish, you already have a strong base for cooking countless braised dishes in other cuisines including French, Italian, Belgian, German, Chinese, Vietnamese, you name it. Use the same method to cook adobo and swap the vinegar and bay leaves out for shaoxing wine (rice wine) and sugar, you’ll end up with a more Chinese dish. Use crushed tomatoes and white wine instead and you’re going in a more Italian direction. With more experience, you can even get comfortable enough to come up with flavors based on whatever’s in your kitchen and make a dish that’s entirely your own.
To get that comfortable, you’ll want to look at the cooking techniques being used in recipes rather than what ingredients are going in the pot. To help steer you in that direction let’s go over the steps for a basic braise
Here, I’ve listed the basic steps of braising. The steps leading up to the actual “braise” are for building flavors. If you’re completely new to the kitchen or just want to dip your toe in the water for fear of messing everything up on your first try, I suggest skipping the searing and sautéing and jump straight into throwing everything in the pot for the braise (step 8 immediately below). You’ll still end up with a pretty decent dish.
- Sear meat until nicely brown (~4min), then sear other side (~3min)
- Remove meat
- Saute aromatics (usually the dry ingredients)
- Deglaze pot with a little braising liquid
- Add rest of braising liquid
- Return meat to pot
- Cover and bring to a boil
- Once boiling, reduce to simmer (lowest heat setting). Now you’re “braising!“
- Let simmer until done (times vary depending on the type of meat)
- Remove meat and finish sauce to liking
Now, we can get back to our ingredients. For simplicity and ease, we’ll stick with chicken dark meat. It doesn’t take long for it to cook through (45 minutes) and it’s very forgiving in case the pot runs for 10 or 15 minutes too long.
We’ll start with Filipino adobo because, well, I’m the kuya. Also, we don’t have to work with as many ingredients. Notice that the recipe steps are nearly identical. To reiterate, you’re using the same cooking method for everything below. The ingredients are simply swapped out.
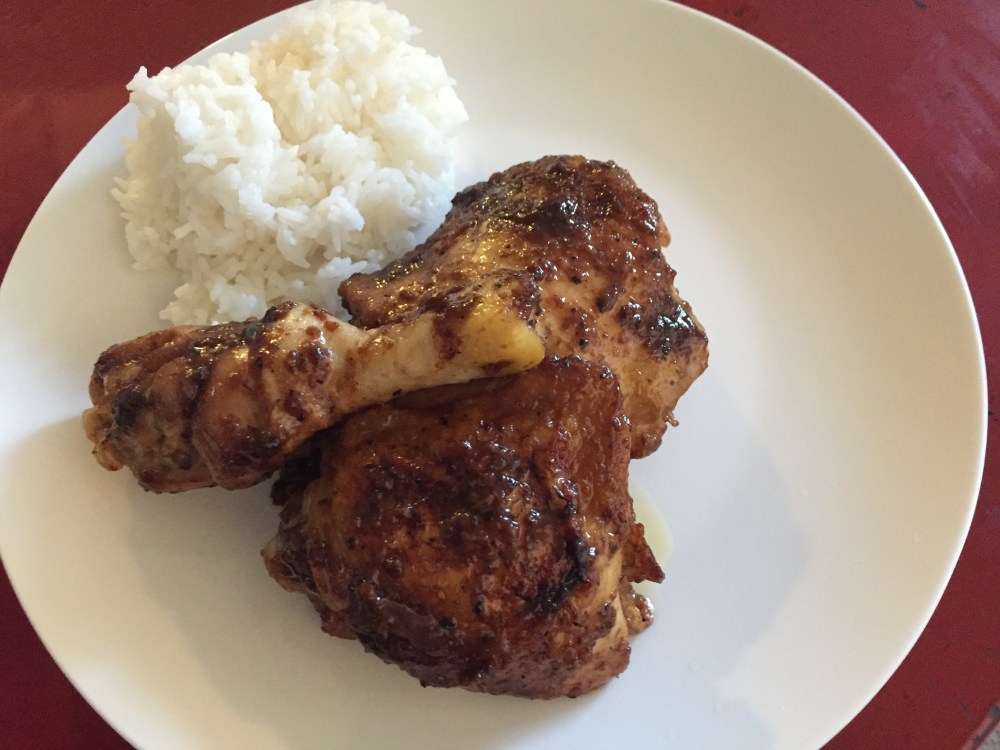
Filipino Chicken Adobo
Ingredients:
- 6 Pieces Chicken Legs and Thighs (1.5-2 Lbs)
- 4 Tablespoons Soy Sauce
- 4 Tablespoons Vinegar
- 6 Cloves Garlic
- 1 Teaspoon Black Pepper
- 2 Bay Leaves
- 1 Cup Chicken Stock
Steps:
- Mix the soy sauce, vinegar, and chicken stock. This mixture is now your braising liquid.
- Sear chicken skin side down until nicely brown (~4min), then sear other side (~3min).
- Remove chicken.
- Saute garlic, bay leaves, and pepper.
- Deglaze the pot by pouring a little braising liquid and scraping the bottom of the pot, making sure to get all the browned bits detached from the pot.
- Add rest of braising liquid.
- Return chicken to the pot.
- Cover and bring to a boil.
- Once boiling, reduce to simmer (lowest heat setting). Now you’re braising!
- Let simmer for 45 minutes.
- Remove chicken.
- Keep the sauce simmering until it reduces down to the consistency of your liking. If you like is thin and soupy, move on to the next step. If you like if thick and saucy, keep the pot on for several more minutes.
- Taste your sauce and add more salt, pepper, soy sauce, and or vinegar to you liking.
- Return the chicken to the pot and mix around to coat the chicken in your finished sauce.
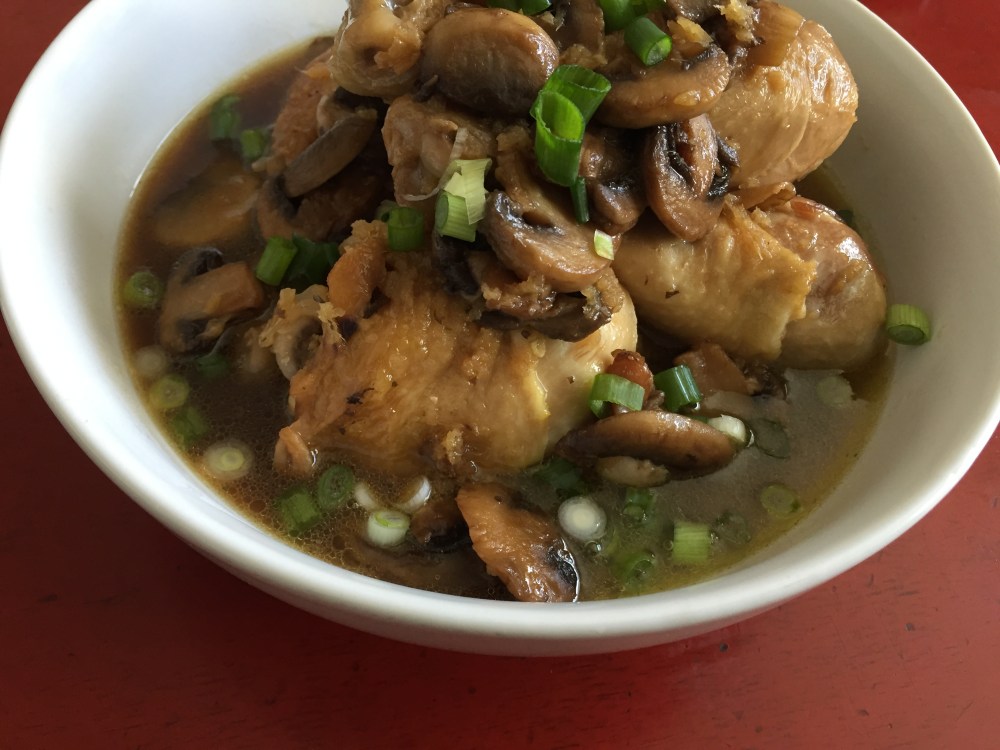
Chinese Braised Chicken and Mushrooms
Ingredients:
- 6 Pieces Chicken Legs and Thighs (~1.5-2 Lbs)
- 3 Tablespoons Soy Sauce
- 3 Tablespoons Rice Cooking Wine (preferably shaoxing wine, but mirin is fine. Low key, I used mirin.)
- 1 Teaspoon Sugar
- 1 Cup Chicken stock
- 1 Tablespoon of Ginger (grated or minced)
- 1 Star Anise
- 1 Cup Mushrooms
- 1 Stalk Green Onion
Steps:
- Mix the soy sauce, rice wine, and chicken stock. This mixture is now your braising liquid.
- Sear chicken skin side down until nicely brown (~4min), then sear other side (~3min).
- Remove chicken.
- Saute mushrooms. They expel a lot of water, so keep cooking them until all the water is squeezed out and evaporated so that the mushrooms start sizzling (~8min).
- Saute ginger and star anise.
- Deglaze pot by pouring a little braising liquid and scraping the bottom of the pot, making sure to get all the browned bits detached from the pot.
- Add rest of braising liquid.
- Return chicken to the pot.
- Cover and bring to a boil.
- Once boiling, reduce to simmer (lowest heat setting). Now you’re braising!
- Let simmer for 45 minutes.
- Remove chicken.
- Keep the sauce simmering until it reduces down to the consistency of your liking. If you like is thin and soupy, move on to the next step. If you like if thick and saucy, keep the pot on for several more minutes.
- Taste your sauce and add more salt, pepper, and/or soy sauce to you liking.
- Return the chicken to the pot and mix around to coat the chicken in your finished sauce.
- Garnish with Green Onions
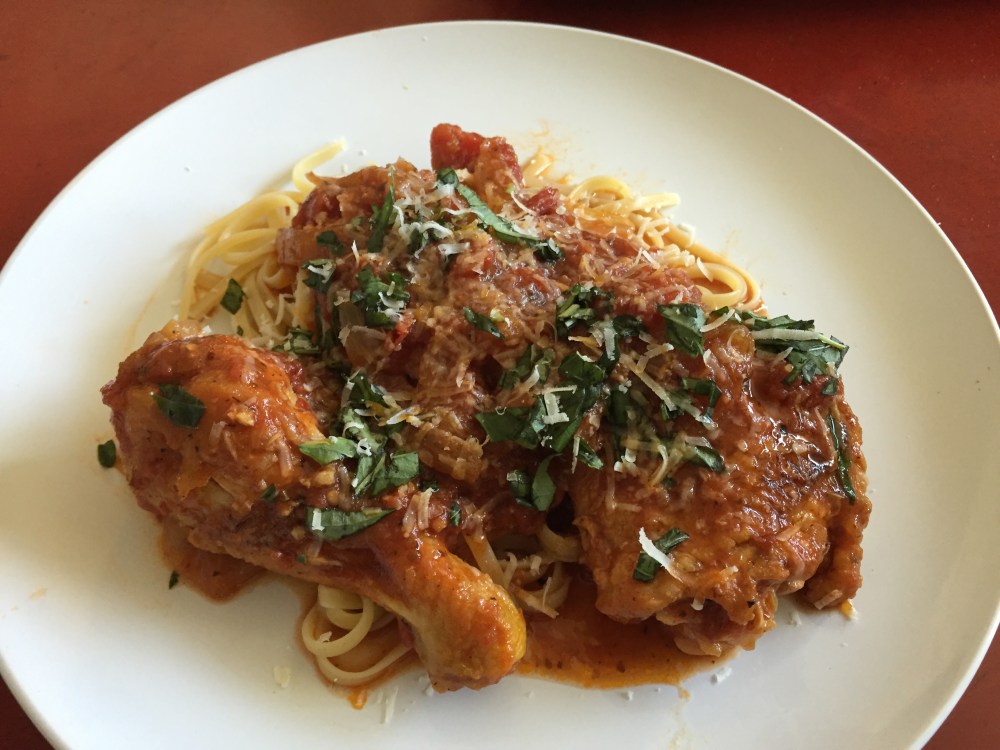
Chicken Cacciatore (Italian)
Ingredients:
- 6 Pieces Chicken Legs and Thighs (~1.5-2 Lbs)
- 1 Can Tomatoes
- 6 Cloves Garlic (minced)
- 1 Onion (julienned (cut into strips))
- 6 Basil Leaves plus more for garnishing
- 1 Cup White Wine
- 2 Teaspoons Salt
- 1 Teaspoon Oregano
- Parmesan Cheese
Steps:
- Reduce the white wine by simmering it in a pot. Keep simmering until it’s reduced by half (~10min).
- If you have a can of whole tomatoes, crush the tomatoes with your hands in a bowl. Careful, it can get messy.
- Mix the reduced wine and canned tomatoes. This mixture is now your braising liquid.
- Season the chicken on both sides with salt and pepper.
- Sear chicken skin side down until nicely brown (~4min), then sear other side (~3min).
- Remove chicken.
- Saute onions until soft and translucent.
- Saute garlic and oregano.
- Deglaze pot by pouring a little braising liquid and scraping the bottom of the pot, making sure to get all the browned bits detached from the pot.
- Add rest of braising liquid.
- Return chicken to the pot.
- Cover and bring to a boil.
- Once boiling, reduce to simmer (lowest heat setting). Now you’re braising!
- Let simmer for 45 minutes.
- Remove chicken.
- Keep the sauce simmering until it reduces down to the consistency of your liking. If you like is thin and soupy, move on to the next step. If you like if thick and saucy, keep the pot on for several more minutes.
- Add in basil leaves.
- Taste your sauce and add more salt and/or pepper to you liking.
- Return the chicken to the pot and mix around to coat the chicken in your finished sauce.
- Garnish with as much basil and Parmesan cheese as you’d like.
S
Thai Green Curry w/ Chicken
Ingredients:
- 6 Pieces Chicken Legs and Thighs (~1.5-2 Lbs)
- 1 Can Coconut Milk
- 1 Green Chili Pepper (like jalapeño, Serrano. If using small chilis like Thai Finger chilis, use 3 pieces)
- 1 Stalk Lemon Grass
- 1 Cup Cilantro
- 6 Garlic Cloves(grated or minced)
- 1 Tablespoon Ginger (grated or minced)
- 1 Tablespoon Lime Juice
- Zest of 1 Lime
- 6 Basil Leaves
- 4 Teaspoons Fish Sauce (Patis!)
- 1 Tablespoon Soy Sauce
- 2 Teaspoon Ground Cumin
- 2 Teaspoon Ground Coriander Seed
- 1 Teaspoon Sugar
Steps:
- Remove the seeds from the chili, unless you like living on the edge. If you like some hot spice in your curry, keep a few seeds in.
- Combine in a bowl the soy sauce, cumin, coriander seed, ginger, garlic, lemongrass, lime zest, lime juice, fish sauce, chili, cilantro, and sugar. Mash and mix until a paste is formed. This is your Thai green curry paste (homemade ftw!).(Note: If you have a food processor, this would be a good time to use it (much easier than using a spoon). If using, throw in said ingredients and keep pulsing until a paste is formed.)
- The coconut milk is your braising liquid.
- Sear chicken skin side down until nicely brown (~4min), then sear other side (~3min).
- Remove chicken.
- Saute curry paste.
- Deglaze pot by pouring a little braising liquid and scraping the bottom of the pot, making sure to get all the browned bits detached from the pot.
- Add rest of braising liquid.
- Return chicken to the pot.
- Cover and bring to a boil.
- Once boiling, reduce to simmer (lowest heat setting). Now you’re braising!
- Let simmer for 45 minutes.
- Remove chicken.
- Keep the sauce simmering until it reduces down to the consistency of your liking. If you like is thin and soupy, move on to the next step. If you like if thick and saucy, keep the pot on for several more minutes.
- Add in the basil.
- Taste your sauce and add more salt, pepper, soy sauce, fish sauce, and/or lime juice to you liking.
- Return the chicken to the pot and mix around to coat the chicken in your finished sauce.
Now go and cook! Make some adobo. Make some cacciatore. Get creative. Come up with your own braising liquids. Experiment with other types of meat. Get your braise on!

