“It is not a meal unless there is rice,” my grandma would say, sometimes even putting rice in her bowl of spaghetti. Growing up, I soon found out that this phrase echoed in many other Filipino households. Traditionally, every Filipino meal is accompanied with rice. The same is true for practically all of Asia. Rice is to Asia how bread is to Europe. Visit France and you’ll be served bread with every meal. So, with all the carbs being cooked up every meal, you’re bound to have some leftovers. What to do with all the leftover rice from the night before in the days pre-microwave? Well you fry it of course.
Thus became the typical Filipino breakfast consisting of some type of meat, fried eggs, and fried rice. But not just any fried rice. Since Filipinos also love to put garlic in everything, GARLIC fried rice is the way to go to start off your day.
But this post isn’t just about garlic fried rice. This is about one of those times when we all have a stroke of genius. Those times when something just clicks and you combine two of your favorite foods together to create something amazing and new. Almost like those days during summer vacation away from school when you spontaneously think of putting potato chips in your sandwich and swear it’s the best thing ever. I’m usually not one to brag, but this is one of those times.
While I was going through a sushi craving, I was reaching for one of those crispy rice spicy tuna little morsels (you may already see where I’m going with this). You know, those little elevated spicy tuna sushi things that were popularized by Chef Nobu Matsuhisa and now found in almost every new sushi spot. I thought, “can I have this rice for breakfast?” And so I made it for breakfast the next chance I got.
First things first, what kind of rice are we dealing with? Well usually in sushi places, you’re usually working with sushi rice, which is usually short grain – more glutinous and sticky than the long grain found in Filipino kitchens. Turns out, the long grain jasmine (milagrosa) rice in my cupboard worked out just fine.
Second, does it have to be leftover rice? These days, waiting for rice to become “leftover” is often a burden, having to make a larger batch than usual the day before you’re actually planning to have fried rice. Turns out the newly cooked rice turned out to be better since leftover rice grains don’t stick to each other as well. Less sticky rice means harder to make patties.
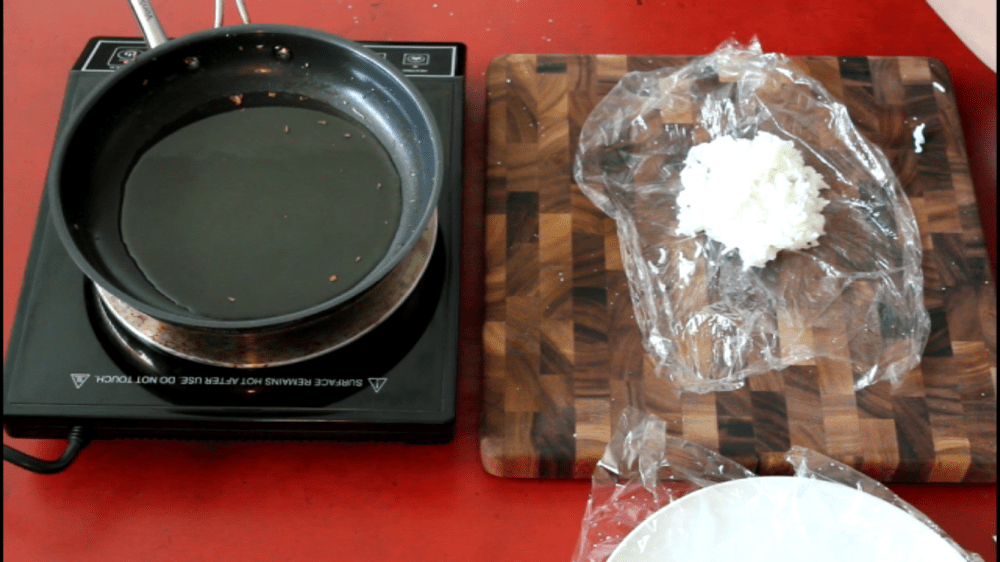
So how do we work with rice since it loves to just stick to our fingers? You’ll want to get some cling film plastic wrap, which the rice won’t stick to. Tear off two large pieces – one to line a plate where you’ll put your formed rice patties, and one to shape your patties. See the video for my “twist and flatten” method. Just be mindful of your working with freshly cooked hot rice. Things can get painful.


With those questions out of the way, things get pretty straight forward.
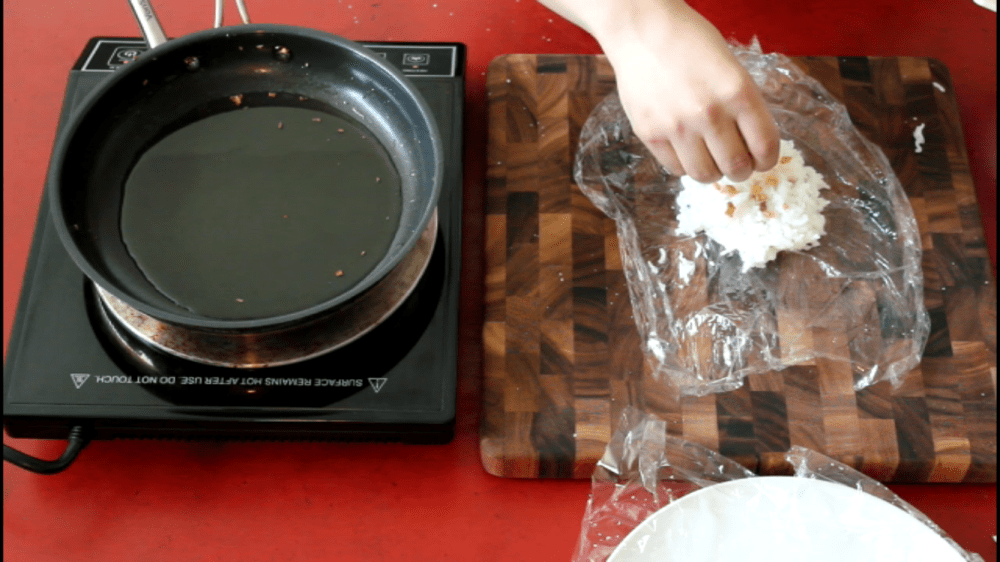
I wanted to get the fried garlic bits in, but put them on the surface of the rice party and they burn way too fast. So, I put them in the middle. The garlic gets distributed throughout the patty so you get garlic in each bite.
Note that we’re using enough oil to do a shallow fry. You can use less oil to do more of a sear, but I prefer a shallow fry to get a more even crispiness all over the surface. Once in the pan, leave it be for a couple minutes, lest all your hard patty forming work go to waste. Afterwards, check underneath for a light browness then flip to do the other side.

And there you have it, world! Garlic crispy fried rice. Great for breakfast, lunch, dinner, hors douvres, and midnight snacks. They’re perfect for all of your silogs, like the ribeye bisteksilog pictured below. All you need is some bistek and a fried egg to go on top.
Crispy Sinangag – Garlic Crispy Fried Rice
Ingredients:
- 2-3 Cloves of Garlic (Chopped)
- 3 Cups Rice (Cooked)
- Salt to taste
Active Time: 10 Minutes
Total Time: 10 Minutes
Steps:
- Pour oil in the pan.
- Throw in chopped garlic.
- Put over medium-low heat. (Starting the garlic in a cold pan will ensure you’re less likely to burn the garlic.)
- Once garlic bits are lightly browned, strain out, then pour oil back in pan. Turn off the heat.
- Tear off two pieces of plastic cling film wrap – one to form your patties and one on a plate to set your patties aside.
- Take a scoop of rice and place on the working plastic wrap.
- Sprinkle in some garlic bits and add a pinch of salt.
- Place a little more rice on top to cover the garlic.
- Form a rice ball by twisting the rice in the plastic wrap. If any garli bits are showing on the surface, push it in with your finger and twist the rice in the plastic again to reform the ball.
- Keeping the rice ball in the plastic, place it down on your working space.
- Untwist the plastic. Using the plastic wrap, press down on the ball with a flat hand to form a patty. Set aside on the plastic lined plate while you form the rest of the patties.
- Turn the heat back on to medium-high.
- Carefully place each patty in the pan.
- Fry until lightly browned (approximately 3-5 minutes, depending on your liking).
- Flip and fry until lightly browned on the other side.
- Remove and drain on a paper towel lined plate, or (even better) on a cooling wrap on a baking sheet.
- Top with your favorite meat and fried egg or eat on the side with adobo.
- Youre welcome.

